- 搜尋裝置
- 連結裝置
- 傳送指令至裝置上
首先要先宣告下列三個物件與常數,
private static BluetoothAdapter mBluetoothAdapter = null; // 用來搜尋、管理藍芽裝置
private static BluetoothSocket mBluetoothSocket = null; // 用來連結藍芽裝置、以及傳送指令
private static final UUID MY_UUID = UUID.fromString("00001101-0000-1000-8000-00805F9B34FB"); // 一定要是這組
private static  OutputStream mOutputStream = null;
private final int REQUEST_ENABLE_BT=1;
第一個物件是用來判斷android的藍芽是否有開啟,
或者可不可以用,以及利用該物件去搜尋裝置。
第二個物件是用來連結藍芽裝置的,
第三個常數是固定的,因為連線是用serial port,所以固定用這組。
第四個是等等用來傳指令的outputStream
接著下面的code,是用來做init的動作
mBluetoothAdapter = BluetoothAdapter.getDefaultAdapter();
if (mBluetoothAdapter == null) {
    // 如果裝置不支援藍芽
    Toast.makeText(this, "Device doesn't support bluetooth", Toast.LENGTH_SHORT).show();
    return;
}

// 如果藍芽沒有開啟
if (!mBluetoothAdapter.isEnabled()) {
    // 發出一個intent去開啟藍芽,
        Intent mIntentOpenBT = new Intent(BluetoothAdapter.ACTION_REQUEST_ENABLE);
        startActivityForResult(mIntentOpenBT, REQUEST_ENABLE_BT);
}
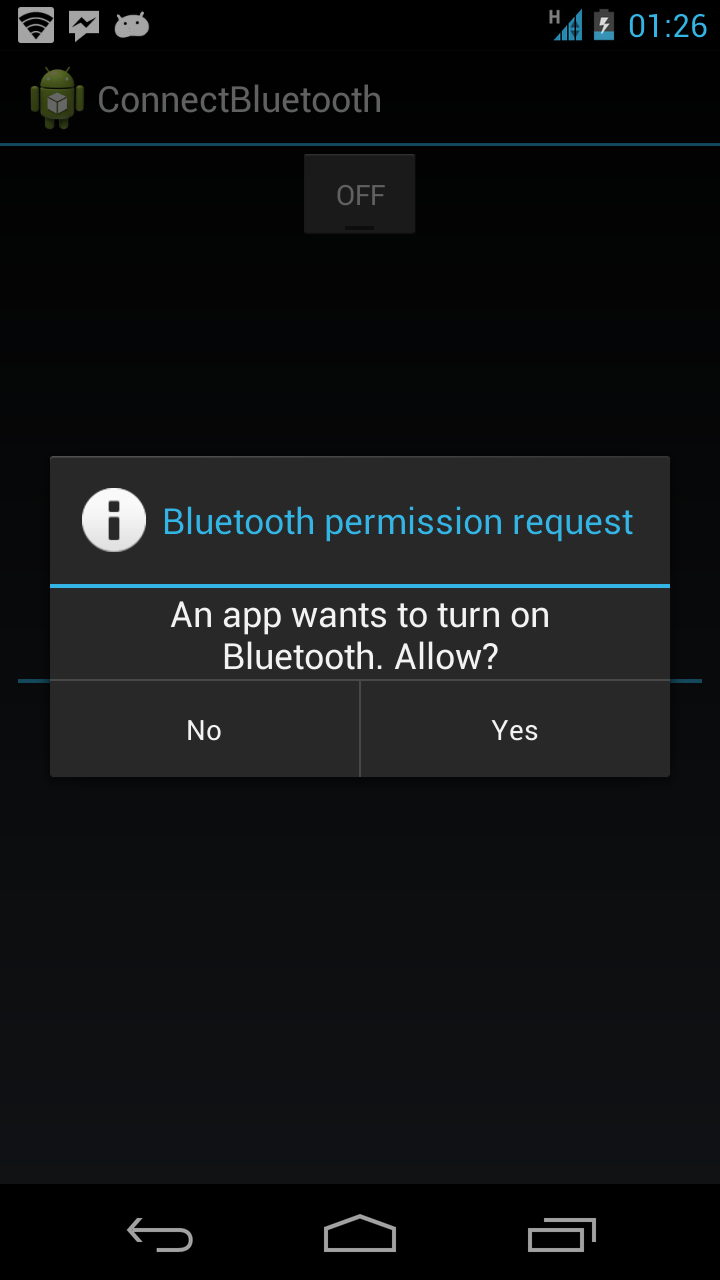
上段的第二個if當中,如果你手機的藍芽未開啟,
會進到if,進到if以後就會發出一個intent request去開啟藍芽,
基本上會看到下面的畫面,會詢問你是否要開啟藍芽。
如果按下Yes,接著會在onActivityResult接收到。
這裡就不多做說明。
這裡假設手機的藍芽已經開啟。
接著下段code是去判斷這台手機裡面,
是否有已經配對過的藍芽裝置,
當然,你也可以在for迴圈中判斷是否有你要連結的裝置名稱,
有的話,就可以直接在這裡連結至裝置。
但這裡假設我們要連結的裝置還沒有配對過
// 取得目前已經配對過的裝置
Set<bluetoothdevice> setPairedDevices = mBluetoothAdapter.getBondedDevices();

// 如果已經有配對過的裝置
if (setPairedDevices.size() > 0) {
    // 把裝置名稱以及MAC Address印出來
    for (BluetoothDevice device : setPairedDevices) {
        mArrayAdapter.add(device.getName() + "\n" + device.getAddress());
    }
}
接下來我們要註冊一個BroadcastReceiver,主要是用來接收【搜尋到附近藍芽裝置】的訊息
// 註冊一個BroadcastReceiver,等等會用來接收搜尋到裝置的消息
IntentFilter filter = new IntentFilter(BluetoothDevice.ACTION_FOUND);
registerReceiver(mReceiver, filter);
mBluetoothAdapter.startDiscovery(); //開始搜尋裝置
接著要宣告上段code使用到的BroadcastReceiver,
private final BroadcastReceiver mReceiver = new BroadcastReceiver() {
        public void onReceive(Context context, Intent intent) {
            // 當收尋到裝置時
            if (BluetoothDevice.ACTION_FOUND.equals(intent.getAction())) {
                // 取得藍芽裝置這個物件
                BluetoothDevice device = intent.getParcelableExtra(BluetoothDevice.EXTRA_DEVICE);

                // 判斷那個裝置是不是你要連結的裝置,根據藍芽裝置名稱判斷
                if (device.getName().equals("MY_DEVICE_ID")){
                    try {
                        // 一進來一定要停止搜尋
                        mBluetoothAdapter.cancelDiscovery();

                        // 連結到該裝置
                        mBluetoothSocket = device.createInsecureRfcommSocketToServiceRecord(MY_UUID);
                        mBluetoothSocket.connect();

                        // 取得outputstream
                        mOutputStream = mBluetoothSocket.getOutputStream();

                        // 送出訊息
                        String message = "hello";
                        mOutputStream.write(message.getBytes());

                        } catch (IOException e) {

                        }
                }

            }
       }
};
在上段code中的連結到該裝置的code,基本上會看到下圖,
要你輸入配置碼,輸入以後,就可以連結到該裝置,
並且可以傳送訊息到你的藍芽裝置上去了。

最後,記得要在關閉程式,或者暫停時,
把連線關掉!
@Override
protected void onPause() {
    super.onPause();
    try {
        if (mBluetoothSocket.isConnected()){
            mBluetoothSocket.close();
        }
        unregisterReceiver(mReceiver);
    } catch (IOException e) {
        e.printStackTrace();
    }
}
恩,下一篇會教學大家怎麼用Android透過藍芽連結到Arduino電路板上去。