這篇主要會講解Android端如何實作,其實和以前在C2DM時差不多
如果要看差異以及一些參數說明,可以到下面幾篇文章去看
第一篇在講參數說明
第二篇在講流程說明
這裡就直接進入主題,
首先一樣要在Manifest檔案中,要有下列的permission,
    <permission android:name="net.kenyang.gcm.permission.C2D_MESSAGE" android:protectionLevel="signature" />
    <uses-permission android:name="net.kenyang.gcm.permission.C2D_MESSAGE" />
    <uses-permission android:name="com.google.android.c2dm.permission.RECEIVE" />
    <uses-permission android:name="android.permission.INTERNET" />
    <uses-permission android:name="android.permission.GET_ACCOUNTS" />
    <uses-permission android:name="android.permission.WAKE_LOCK" />
接著就是要新增一個receiver,
而receiver必須聆聽兩個事件,分別為receive以及registration!
    <receiver
        android:name="net.kenyang.gcm.GcmBroadcastReceiver"
        android:permission="com.google.android.c2dm.permission.SEND" >
        <intent-filter>
            <action android:name="com.google.android.c2dm.intent.RECEIVE" />
            <action android:name="com.google.android.c2dm.intent.REGISTRATION" />
            <category android:name="net.kenyang" />
        </intent-filter>
    </receiver>
再寫code之前,請先確定你的eclipse有裝下面的兩個plugin,

安裝完成以後,請去到你的sdk folder裡面找到下面兩個jar檔,並且include他們兩個!
- android-sdk-macosx/extras/google/gcm/gcm-client/dist/gcm.jar
- android-sdk-macosx/extras/google/google_play_services/libproject/google-play-services_lib/libs/google-play-services.jar
接著開始寫code,
android分為三個部分,
- 向Google 註冊,並且取得registration id
- 傳送id給我們的server
- 準備接收資料
首先是註冊,記得改成你的sender_id!
sender_id就是你的project id,可以到api console去看你的id,
會有下圖,project number就是你的project id了!
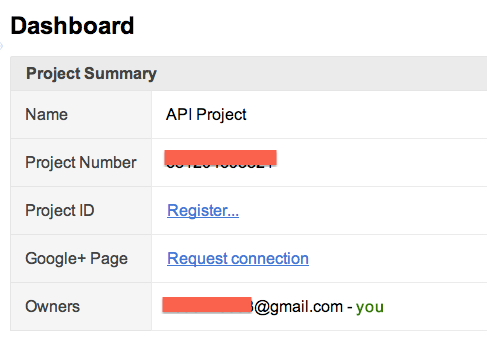
記得把它填入sender_id中!
    GoogleCloudMessaging gcm;
    String SENDER_ID = "xxxxxxxxxxx";
    @Override
    protected void onCreate(Bundle savedInstanceState) {
        super.onCreate(savedInstanceState);
        setContentView(R.layout.activity_main);

        tvRegisterMsg = (TextView) findViewById(R.id.tvRegisterMsg);
        context = getApplicationContext();

        // initial GCM
        gcm = GoogleCloudMessaging.getInstance(this);

        // register with Google.
        new AsyncTask<Void,String,String>() {
            @Override
            protected String doInBackground(Void... params) {
                String msg = "";
                try {
                    if (gcm == null) {
                        gcm = GoogleCloudMessaging.getInstance(context);
                    }
                    strRegId = gcm.register(SENDER_ID);
                    msg = "Device registered, registration id=" + strRegId;

                    // send id to our server
                    sendRegIdToServer(strRegId);
                } catch (IOException ex) {
                    msg = "Error :" + ex.getMessage();
                }
                return msg;
            }

            @Override
            protected void onPostExecute(String msg) {
                tvRegisterMsg.append(msg + "\n");
            }

        }.execute(null, null, null);
    }
接著是第二部分,把id傳送到我們的server,
 private void sendRegIdToServer(final String strId) {
  new AsyncTask<Void,String,String>() {
   @Override
   protected String doInBackground(Void... params) {
    String strResponseCode = "";
    try {
     HttpRequestBase request =null;
     request = new HttpGet(new URI("http://your_server/storeRegId?id="+strId));

     request.addHeader("User-Agent", "Android");
     HttpResponse response =  Connection.connect((HttpGet)request);

     strResponseCode =  String.valueOf(response.getStatusLine().getStatusCode());
    } catch (ClientProtocolException e) {
     // TODO Auto-generated catch block
     e.printStackTrace();
    } catch (IOException e) {
     // TODO Auto-generated catch block
     e.printStackTrace();
    } catch (URISyntaxException e) {
     // TODO Auto-generated catch block
     e.printStackTrace();
    }

    return strResponseCode;
   }

   @Override
   protected void onPostExecute(String msg) {
    tvRegisterMsg.append("status code:  " + msg + "\n");
   }

  }.execute(null, null, null);
 }
到了此步驟你在畫面上應該會看到registration_id和status code是200!
如果是上述的結果的話,就代表你向Google註冊成功了!以及也把registration id傳送給我們的server知道了!
接著就來implement receiver的部分!
這個receiver會接收來自Google Server的資料,
並且把資料丟到我們的notification bar當中!
public class GcmBroadcastReceiver extends BroadcastReceiver {
 static final String TAG = "GCMDemo";
 public static final int NOTIFICATION_ID = 1;
 private NotificationManager mNotificationManager;
 NotificationCompat.Builder builder;
 Context ctx;

 @Override
 public void onReceive(Context context, Intent intent) {
  GoogleCloudMessaging gcm = GoogleCloudMessaging.getInstance(context);
  ctx = context;
  String messageType = gcm.getMessageType(intent);
  if (GoogleCloudMessaging.MESSAGE_TYPE_SEND_ERROR.equals(messageType)) {
   sendNotification("Send error: " + intent.getExtras().toString());
  } else if (GoogleCloudMessaging.MESSAGE_TYPE_DELETED .equals(messageType)) {
   sendNotification("Deleted messages on server: " + intent.getExtras().toString());
  } else {
   sendNotification("Received: " + intent.getExtras().toString());
  }
  setResultCode(Activity.RESULT_OK);
 }

 // Put the GCM message into a notification and post it.
 private void sendNotification(String msg) {
  mNotificationManager = (NotificationManager) ctx.getSystemService(Context.NOTIFICATION_SERVICE);

  PendingIntent contentIntent = PendingIntent.getActivity(ctx, 0,
    new Intent(ctx, Main.class), 0);

  NotificationCompat.Builder mBuilder = new NotificationCompat.Builder(ctx)
    .setSmallIcon(R.drawable.ic_launcher)
    .setContentTitle("GCM Notification")
    .setStyle(new NotificationCompat.BigTextStyle().bigText(msg))
    .setContentText(msg);

  mBuilder.setContentIntent(contentIntent);
  mNotificationManager.notify(NOTIFICATION_ID, mBuilder.build());
 }
}
完成上述以後你就可以開始測試!
只要打開瀏覽器,然後輸入你的site,(http://your_site/send),
接著你的device上應該就會收到訊息了!
訊息會是一個json格式!